Posts

Showing posts from April, 2023

Project Complete: Thing 1 & Thing 2

Image
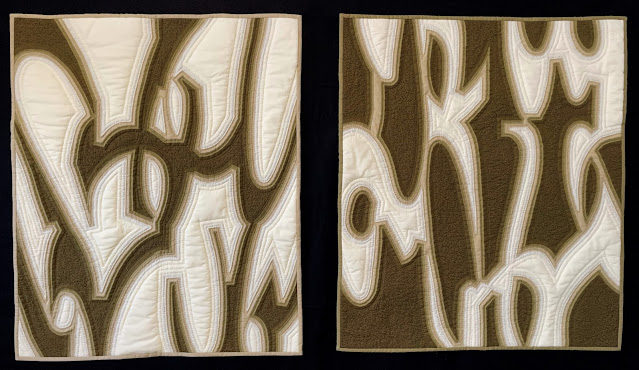
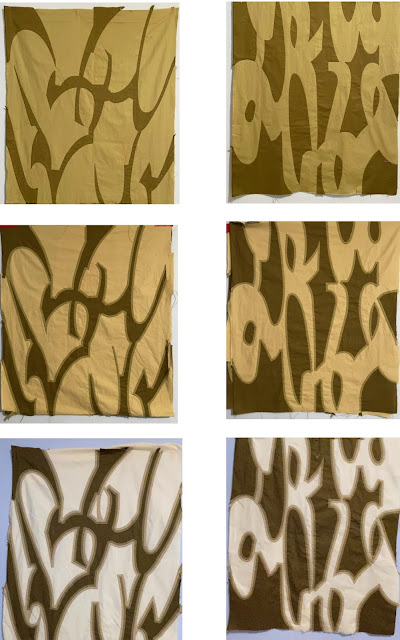
Thing 1 & Thing 2 This is the first time that I have worked on two pieces at the same time and, now that the last stitch has been sewn, this pair of quilts can be displayed side by side. When I bring a new piece to show and tell at a guild meeting, I have found it a bit challenging to clearly describe the difference between appliqué and reverse appliqué, and the advantages for each one. So I thought maybe starting with the same color for this pair would be a handy visual aid for any future trunk shows/lectures, (hint, hint.)    The best way to explain these two techniques is to focus on the darkest green and the part it plays in each piece. On the left, the dark green is the shape on a cream colored background, meaning the dark green shapes were sewn onto the lighter background. On the right, the dark green switches to play the part of the background, so shapes were cut out of the dark green to reveal the lighter color underneath.   Just having a great time playing with all the pos

Side by Side Comparison

Image
Appliqué versus Reverse Appliqué Thought I'd share a sneak peek at what I've been busy with lately.  I chose an earthy green as the starting point in this experiment and worked on both of these designs at the same time. The darkest green was placed on top of a slightly lighter green in each instance.  The one on the left is appliquéd, meaning that dark green shapes were cut out and sewn on to the background color. The piece on the right is reverse appliqué. The dark green is the background, but it is still placed on top of the lighter color. The difference is that holes are cut into the background in the desired shape and then tacked down, revealing the color underneath.  When they are put side by side, it shows the development of the two appliqué techniques. You can also see the interesting effect that was shared in my last post; the image becomes "blurry" as several outlines of increasingly lighter green are added to the shapes in each piece.  It may have been unpla

Unexpected Results

Image
Lately I've been working on two small wall hangings at the same time: one in appliqu é, the other in reverse appliqu é. Both quilt tops have been finished up and the quilting phase has begun. I'm not ready for a big reveal just yet, but I wanted to share this really interesting phenomenon which is especially noticeable when photographed in black & white.  This is the  appliqué top. The dark shapes have been applied to a lighter background in step 1. Step 1 For step 2, the background color in the first photo has been cut away to create an outlined shape on a slightly lighter background. The goal here was to have a gradation that would give the feeling of a gradual indentation, as if someone had carved the dark shapes into a surface, . . .  Step 2 but look at what happened when yet another outline was created around the dark shapes! Step 3 At a distance, the shapes appear blurred, instead of giving the impression of a crisply carved surface. This was something I did not antic