Gift Idea- travel bags
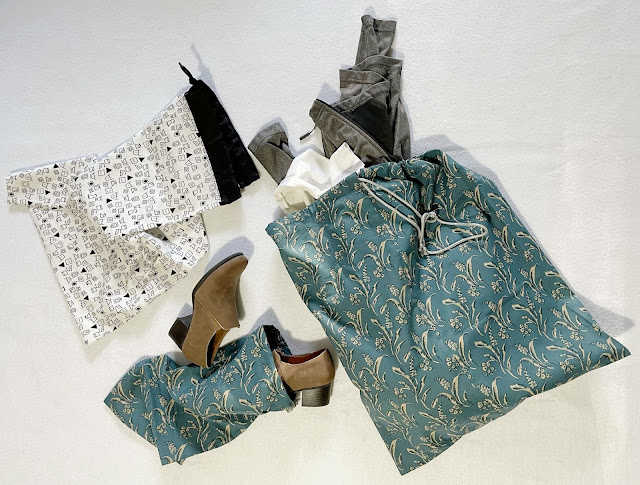
Black & white print of laundry symbols made a cute laundry bag (top left)
If you're looking for a quick, simple project/gift idea, how about travel bags? A small laundry bag and some shoe bags are a colorful, useful addition to any happy wanderer's travel gear.
Then again, now that people are heading back to the office and the commuting routine, maybe you know someone who wears a comfortable shoe to get to the office and switches to a more appropriate shoe when they arrive. A couple of cute shoe bags to drop in a tote will keep good shoes safe for the commute and store sneakers out of sight during the work day.
Set of travel bags:
3 shoe bags & laundry bag from coordinated scraps
A prepackaged fat quarter, which generally measures 18x22, is perfect for a shoe bag,- and pretty inexpensive. Or, depending on the laundry bag size, a yard of 45 inch wide cotton fabric could easily yield at least one good sized shoe bag as well. With so many novelty fabrics out there, there are fabric designs for just about any interest and personality. This is also a great way to use up scraps already on hand.
These bags are quick to make up too. They can be sewn with only two seams!
Let's say a laundry bag is 2/3 of a yard of fabric or 24 inches. The remaining 1/3 is enough for a shoe bag. With the yard still folded, trim off 12 inches to create a rectangle that measures 45x24. The folded edge will be the bottom of the bag and the two side seams are sewn with right sides together. But be aware that this works with fabric designs that don't have a direction.
Always consider the orientation of your fabric design, noting that some designs follow the length of the fabric or look best viewed from one direction. The rectangle will need to be cut along the length of the fabric and more than a yard will be needed for a deep bag. When the design is directional, the front and back should be cut separately, - two pieces, - so the design is not upside down on one side. In this case, there will be two side seams and a bottom seam.
If a basic, simple bag without a drawstring is desired, finish the open end by turning the edge 1/4 inch to the inside, then fold it over a second time to hide the raw edge and sew in place. For a more finished look, sew one side all the way to the top, with right sides together. On the second side, sew to about 2 inches from the top, leave a gap of about 1 inch then sew to the top edge.
Hem by turning under about 1/4 inch, sew and press. Then fold the hem edge 1 inch to form a drawstring casing. Check to see that the hole left on the side seam will be located within the casing when tacked down, (this will allow you to thread the drawstring through the casing.) Make any adjustments so the hole doesn't extend past the casing and sew around the hole's edge to make it sturdier, before sewing the casing in place.
A coordinated cording is a great finish for these bags. The length should be longer that the top of the bag by several inches so it's easier to put things in it and pull the bag shut. To determine how much cord is needed, double up the cord and lay the looped end at one side of the flattened bag with the two lengths across the top of the bag. Give each length at least 6 inches more to extend past the other side, but don't cut yet! Extra cord is needed for the knot and little ends past the knot and this will depend on how heavy the drawstring is. Loosely tie the ends to determine the final length before cutting.
Hint: for a clean cut, professionals wrap tape around the cord and then cut, so it doesn't unravel.
A safety pin on one end of the cord will help guide the drawstring through the casing. Once the cord ends are tied together, gently unravel the cord ends to the knot for a tassel effect.
I would love to hear about your projects and any feedback on these directions in the comment section.
Happy sewing!


Comments
Post a Comment