Quilt Block Construction Continued (2 of 4)
Quilt Block Construction Continued (2 of 4)
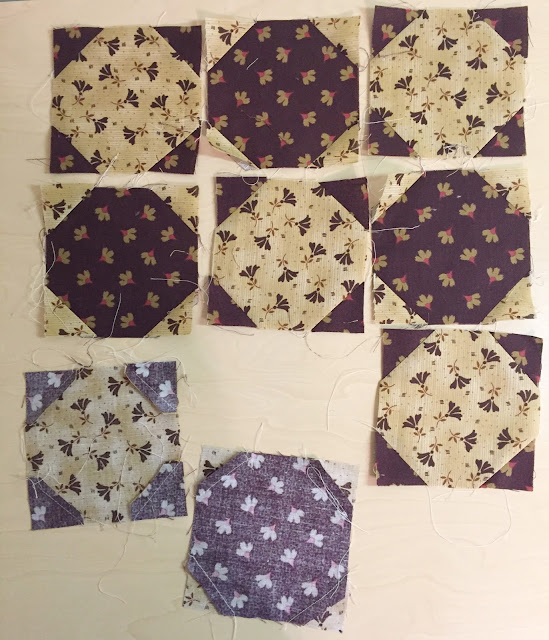
A complete block in this pattern consists of 4 squares with a light center and 5 squares with a dark center, or visa versa, as shown below.
Now we can join our individual blocks,... keep your iron hot.
Pressing the corner seams toward the darkest color makes it easier to line up these short seams as the blocks are joined. Place a dark centered over a light centered square and the seam of the block on top lays to one side, the seam on the bottom block goes in the other direction. Held between your fingers at the point where seams align, they will bump right up to each other and feel even across the thicknesses on both sides of that seam.
The goal is to line up all the seams precisely,... but relax, it's just a goal! The quilt will still keep you warm at night if they don't all align.
When you have a row of three, press the seams open. This will make it easier to join one row to another.
Three rows create a block of nine squares. It is helpful to pin rows at the seams so the layers don’t shift, but be sure to remove the pins as you go; sewing over them could break your needle or damage your machine.
This project shows the two ways of pressing a seam and each has it's pros and cons, so experiment with them. In small areas where multiple seams collide, like the intersections of the squares above, it could be effective to use them in combination. Be conscious that you don't want too many layers of seam allowance in concentrated areas that create an uneven surface and make it more difficult to sew in the last stages.
Well, it's back to the sewing room so I can make more progress and have something to share on this project next week.
A complete block in this pattern consists of 4 squares with a light center and 5 squares with a dark center, or visa versa, as shown below.
Now we can join our individual blocks,... keep your iron hot.
Pressing the corner seams toward the darkest color makes it easier to line up these short seams as the blocks are joined. Place a dark centered over a light centered square and the seam of the block on top lays to one side, the seam on the bottom block goes in the other direction. Held between your fingers at the point where seams align, they will bump right up to each other and feel even across the thicknesses on both sides of that seam.
The goal is to line up all the seams precisely,... but relax, it's just a goal! The quilt will still keep you warm at night if they don't all align.
😉
When you have a row of three, press the seams open. This will make it easier to join one row to another.
Three rows create a block of nine squares. It is helpful to pin rows at the seams so the layers don’t shift, but be sure to remove the pins as you go; sewing over them could break your needle or damage your machine.
The wrong side of a completed block
This project shows the two ways of pressing a seam and each has it's pros and cons, so experiment with them. In small areas where multiple seams collide, like the intersections of the squares above, it could be effective to use them in combination. Be conscious that you don't want too many layers of seam allowance in concentrated areas that create an uneven surface and make it more difficult to sew in the last stages.
Finished Block
Well, it's back to the sewing room so I can make more progress and have something to share on this project next week.


Comments
Post a Comment